How to Set Up Klaviyo: Complete Setup Guide (Step-by-Step)
Quick answer: To set up Klaviyo: (1) get account basics right (business info, sending address, compliance address), (2) connect your Shopify or WooCommerce store, (3) sync historical orders and customers, (4) authenticate a dedicated sending domain with SPF, DKIM and DMARC, (5) build one master list plus a signup form, (6) turn on the five essential flows (welcome, abandoned cart, browse, post-purchase, sunset), then send a test and go live. A clean setup takes an afternoon for the basics.
Key takeaways
- Get account configuration right first — business info, sending address, and compliance address, before anything else.
- Connect the native Shopify or WooCommerce integration — it powers all your data and flows.
- Authenticate a dedicated sending domain before sending at volume, or you’ll land in spam.
- Keep one master list, not several, and use segments instead — this is the #1 structural mistake new accounts make.
- Build a signup form so the welcome flow has people to greet, then turn on the five essential flows before worrying about campaigns.
Just signed up for Klaviyo? This guide takes you from an empty account to live and sending, in the right order. It’s a cluster of our complete Klaviyo flows guide.
Step 1: Account configuration
Before connecting anything, get the account settings right — this is easy to skip and creates avoidable problems later:
- Business name should match exactly what appears in your email footer and on your website — inbox providers and subscribers both use this for recognition.
- Timezone affects when time-based flows fire and campaigns get scheduled; don’t leave it on the US default if you’re not in the US.
- Sending address should be a real, monitored inbox (e.g.
[email protected]), never a no-reply address — replies are a positive deliverability signal, and no-reply addresses suppress them. - Physical address in your account settings is legally required (CAN-SPAM, GDPR) and appears in every email footer; a registered business address builds more trust than a PO box.
Step 2: Connect Shopify or WooCommerce
Shopify: in the Shopify App Store, install Klaviyo: Email Marketing & SMS, then authorize the connection. This native integration syncs your products, customers, orders, and onsite events into Klaviyo in real time, which is what every segment and flow runs on. For the full data picture and platform-specific notes, see the Klaviyo Shopify integration guide.
WooCommerce: use the official Klaviyo WooCommerce plugin. The data sync is similar to Shopify but needs slightly more manual configuration — make sure your WooCommerce order statuses are mapped to the correct Klaviyo events.
Step 3: Sync historical data
When you connect, Klaviyo backfills your historical orders and customer profiles. Let this finish before building segments — it’s what lets you immediately create audiences like “repeat buyers” and “VIPs” based on real purchase history rather than starting from zero.
Step 4: Set up a dedicated sending domain (DNS)
This is the step most beginners skip, and it’s the one that decides whether you reach the inbox. In Klaviyo’s settings, set up a dedicated sending domain (e.g., send.yourstore.com) and add the SPF, DKIM, and DMARC records Klaviyo gives you to your DNS. These prove your emails really come from you. Don’t send at volume until they’re verified — the full reasoning is in the Klaviyo deliverability guide.
Step 5: List architecture — one master list, not many
Klaviyo’s data model trips up people coming from older email platforms. The correct approach: as few lists as possible, as many segments as needed.
- Create one primary list (“All Subscribers” or “Marketing Contacts”) — every opt-in lands here. Don’t create separate lists per product category or campaign group; that’s what segments are for.
- Keep a separate suppressed list for transactional-only contacts (customers who’ve purchased but never opted into marketing) so they get order confirmations but not campaigns.
- Decide single vs. double opt-in: single opt-in (added immediately on form submission) grows your list faster and performs better for most e-commerce brands when paired with a good welcome series. Double opt-in (confirm via email first) gives a cleaner, more engaged list but grows slower — it’s the better choice if you get heavy bot/spam form submissions, and it’s legally required in some regulated markets (Germany, for example).
- Turn on automatic suppression for hard bounces and spam complaints in Klaviyo’s settings — this protects your sender reputation without manual work.
Step 6: Build your first signup form
Create a popup or flyout in Klaviyo’s form builder to capture email (and SMS consent). This grows the list and, crucially, gives your welcome flow people to greet. Keep it simple: a clear offer, one or two fields, and a visible consent checkbox. More detail in our signup forms guide.
Step 7: Turn on the five essential flows
With data and a form in place, switch on the core automations — in this order:
- Welcome series — greets new subscribers (your welcome flow).
- Abandoned cart — recovers unfinished checkouts.
- Browse abandonment — nudges product viewers (browse flow).
- Post-purchase — onboards buyers and cross-sells (post-purchase flow).
- Sunset — cleans unengaged contacts to protect deliverability.
Start from Klaviyo’s templates, then add the conditional splits that keep each flow relevant.
Step 8: Send your first campaign
Once flows are live, send a campaign to an engaged segment (not your whole list). This warms your sending reputation with your most receptive audience before you scale up.
Common setup mistakes to avoid
- Sending from a free address (Gmail.com, Outlook.com) — major inbox providers block these for bulk mail. Always send from your own domain.
- Skipping authentication — the single biggest preventable cause of new-account deliverability problems.
- Creating too many lists — it fragments segmentation and causes profile-sync headaches. Start with one.
- Skipping the on-site tracking snippet — without it, browse abandonment never triggers and your product-catalog data stays limited.
- Turning on every flow at once, untested — send yourself a test on each one, check mobile/desktop rendering, and confirm the trigger fires correctly before it reaches real subscribers.
Go-live checklist
Work through this before you consider the setup done:
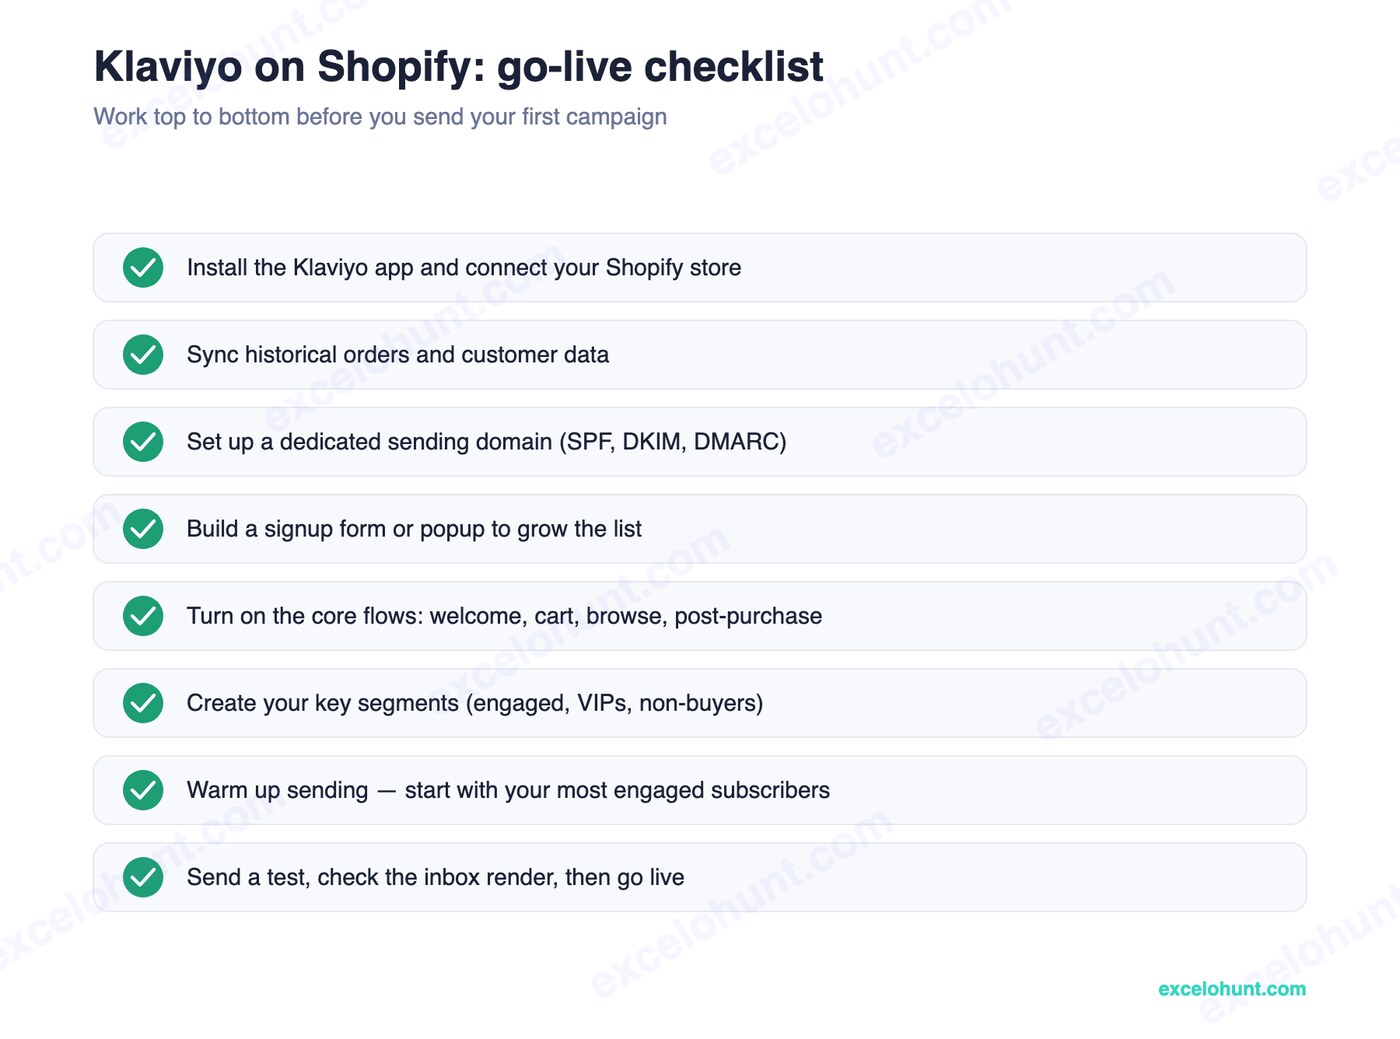
Klaviyo’s own getting-started documentation covers the account mechanics if you get stuck on any step.
Frequently asked questions
How long does it take to set up Klaviyo?
The basics — integration, data sync, a signup form, and the core flows from templates — take an afternoon. Authenticating your domain adds a short wait for DNS to verify. A fully optimized setup with custom flows and segments is more like a 1–2 week project.
Do I need a dedicated sending domain in Klaviyo?
Yes, before you send at volume. A dedicated sending domain with SPF, DKIM, and DMARC authenticates your email and is the single biggest factor in whether you land in the inbox or the spam folder.
Which flows should I turn on first in Klaviyo?
Welcome, abandoned cart, browse abandonment, post-purchase, and a sunset flow. These five capture the highest-intent moments and protect your deliverability before you scale campaigns.
Should I use one list or several in Klaviyo?
One master list for all opt-ins, with segments for everything else — separate product-category or campaign-specific lists cause sync problems and fragment your data. Keep a separate suppressed list only for transactional-only (non-marketing) contacts.
About the author
Ravinderpal Singh is the founder of Excelohunt, a Klaviyo-focused email & SMS agency. We set up Klaviyo accounts for ecommerce brands end to end.
Don’t want to DIY? Our done-for-you Klaviyo setup gets you live in days, fully configured.
More in Klaviyo
- 12 Best Klaviyo Agencies in 2026 (Honest Comparison)
- Klaviyo Agency Pricing: What You Should Pay in 2026
- Optimite Alternatives: Klaviyo Email Agencies Compared (2026)
- How to Use Klaviyo: A Beginner's Guide (2026)
- Best Klaviyo Alternatives in 2026 (Honest Comparison)